Documentation
Google Assistant
Require: IP-Symcon >= 5.0
Description
The Google Assistant module enables the control of devices via Google Assistant. This includes the voice control via Google Home.
Inclusion in IP-Symcon

Using the Google Assistant module requires an active connection to the Connect Service, which in turn requires an active subscription.
Create Google Assistant Instance
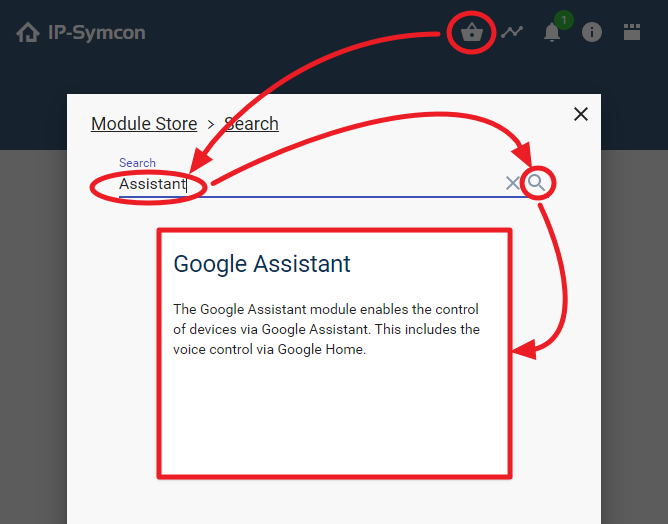
Using the Google Assistant module requires its installation via the Module Store. First, the Module Store needs to be opened. It can be found in the upper right area. The Google Assistant module can be found by entering "Assistant" into the search field. When opening the found module, the installation of the module can be started in the next dialog by clicking "Install".
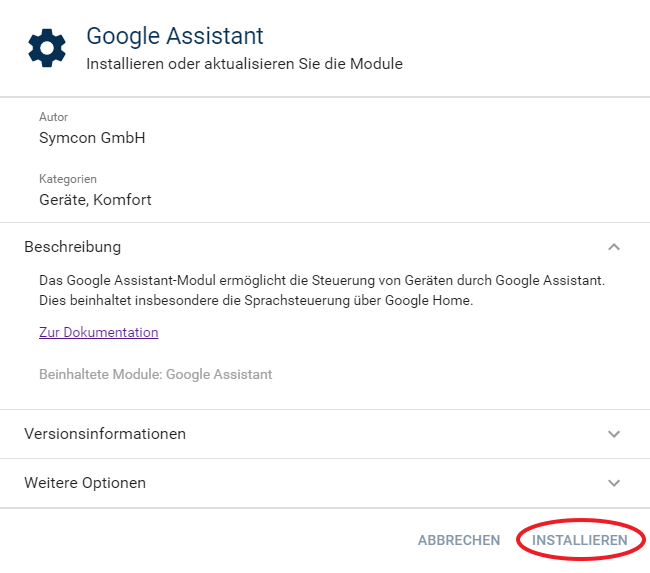
Afterwards, an add dialog for creating an Google Assistant instance opens.
If the instance should be added manually, an Instance of the Google Assistant module needs to be created. This is done by opening the Object Tree. Here, the add button "+" at the bottom right needs to be clicked and Instance selected.
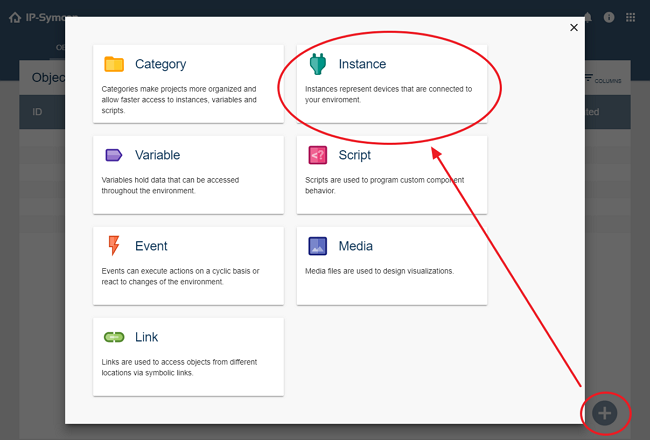
In the module list, select the device "Google Assistant" or "Google Home" from the vendor "Google". The location should not be changed. The name can be chosen at will. Finally, confirm with "OK".
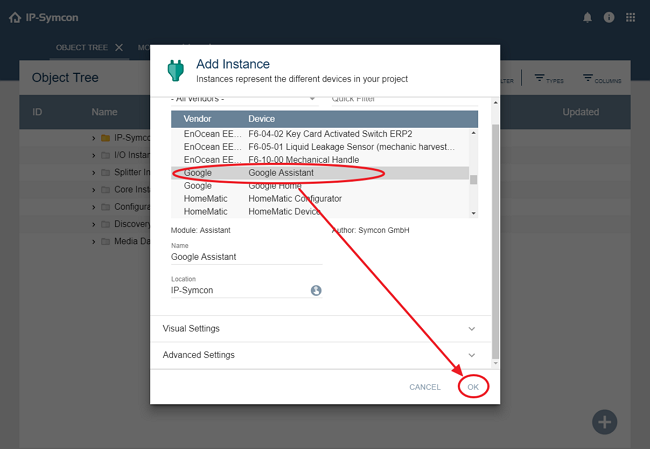
After the creation of the Google Assistant instances, it is opened automatically and can be configured.
Configure Google Assistant Instance
The module offers multiple device types that can be used. Especially the initial setup can be sped up significantly by using the Device Search. Later on, additional devices can easily be added manually.
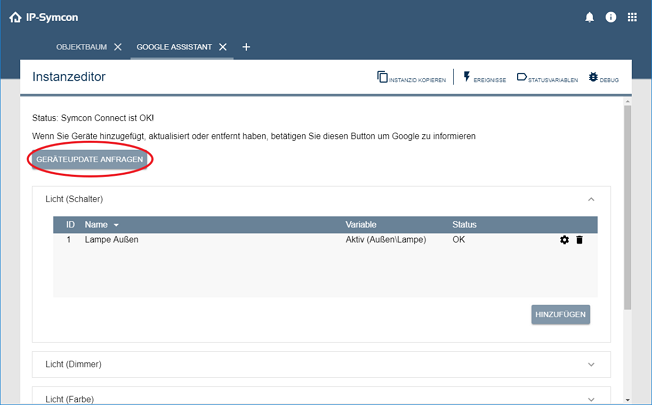
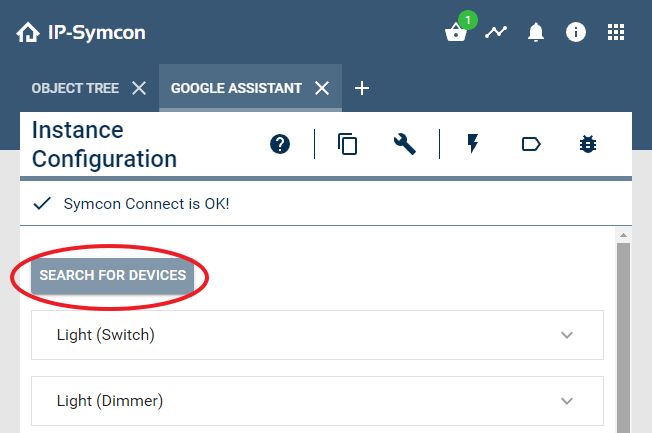
The Device Search is started by clicking the button "Search for Devices" at the top of the instance configuration.
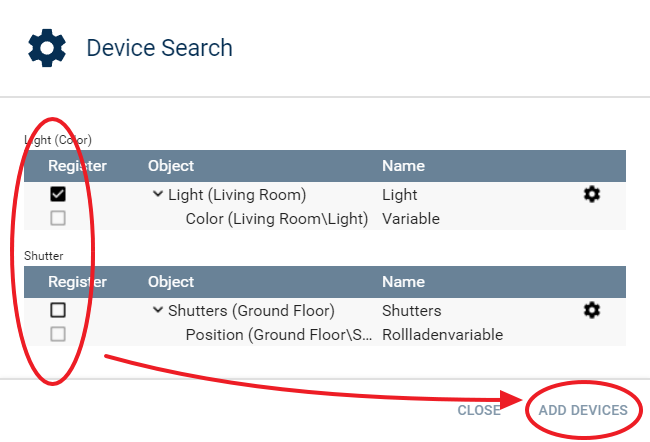
Then, a dialog is opened. After a loading time, found devices that are not yet implemented into Alexa are shown. These instances are seperated by device type. Below each instance, the status variables that are used upon implementation are shown. If an instance should be implemented, the check box at the beginning of the instances row must be checked. By default, the name of the instance is used. If it should be updated, the "Edit" button at the right of the list entry can be clicked. After all desired instances are selected and eventually their names updated, the selection is confirmed by clicking "Add Devices". Then, the selected devices are added to the respective lists in the instance configuration.
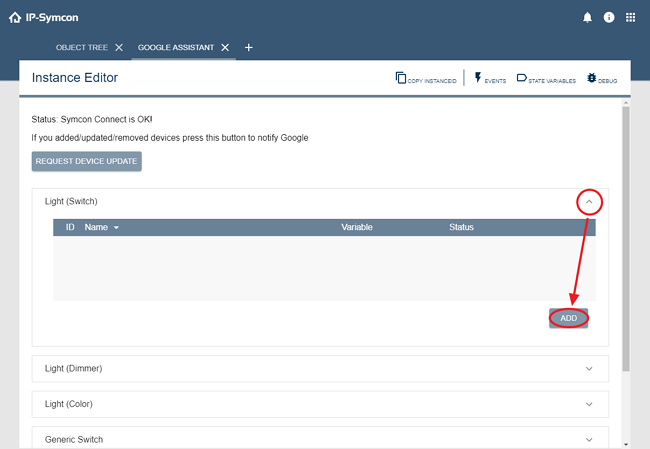
To prepare a device manually, expand its panel and create a new entry in its list by clicking "Add" below the list.
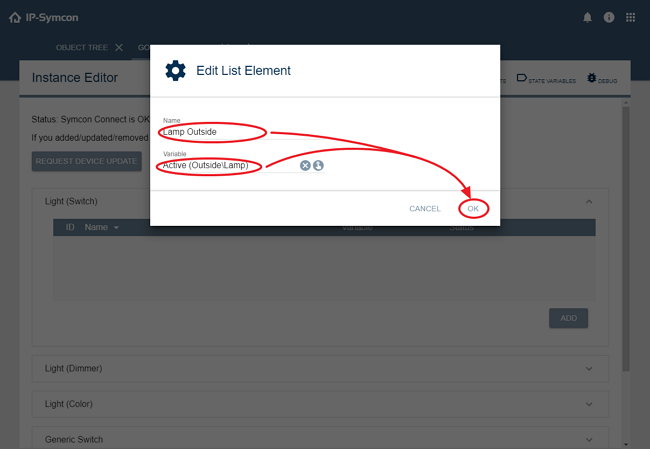
Each entry requires a name, under which the device will be known to Google Assistant. Additional parameters depend on the device type and can be found in the corresponding site of the documentation. After setting all parameters, confirm with "OK".
Possible Device Types
- Light (Switch)
- Light (Dimmer)
- Light (Color)
- Light (Expert)
- Thermostat
- Shutter
- Generic Switch
- Scenes
- Scenes (deactivatable)
After all devices are configured, confirm the settings by clicking "Apply Changes".
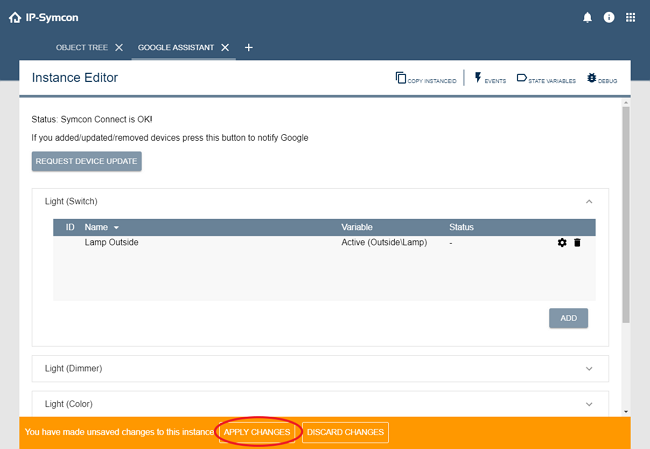
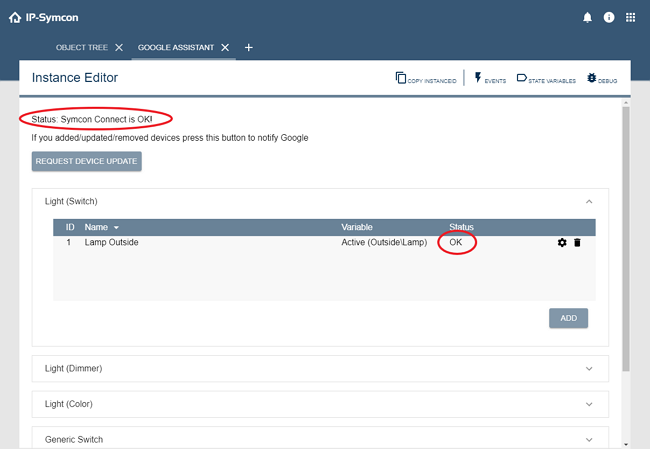
After applying, it is recommended to check that the column "Status" contains "OK" for all devices. If this is not the case, the column contains an error message that contains further information about the complication.
It should also be checked that the label at the top of the instance states "Status: Symcon Connect is OK". Otherwise, the Connect Service needs to be activated.
Connect IP-Symcon to Google Assistant
Finally, IP-Symcon needs to be connected to Google Assistant so the Google Assistant instance can receive requests from Google.
The installation is done with the Google Home app.
Within the app, select the home control tab at the bottom left and tap on "Add".
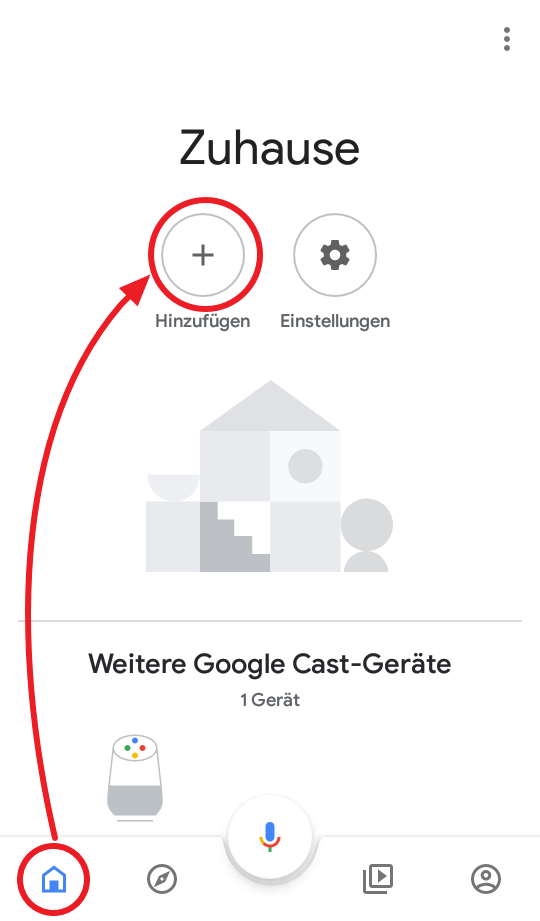
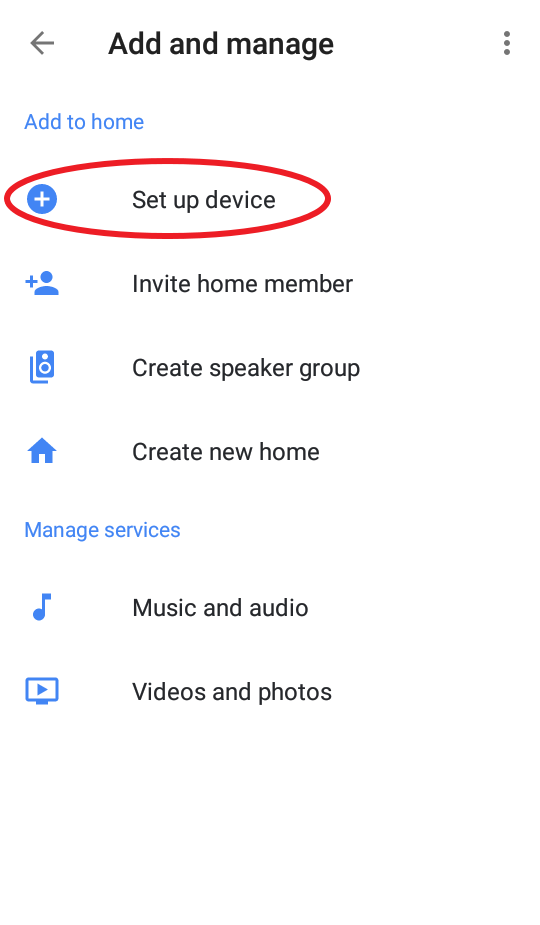
Tap "Set up device" in the menu.
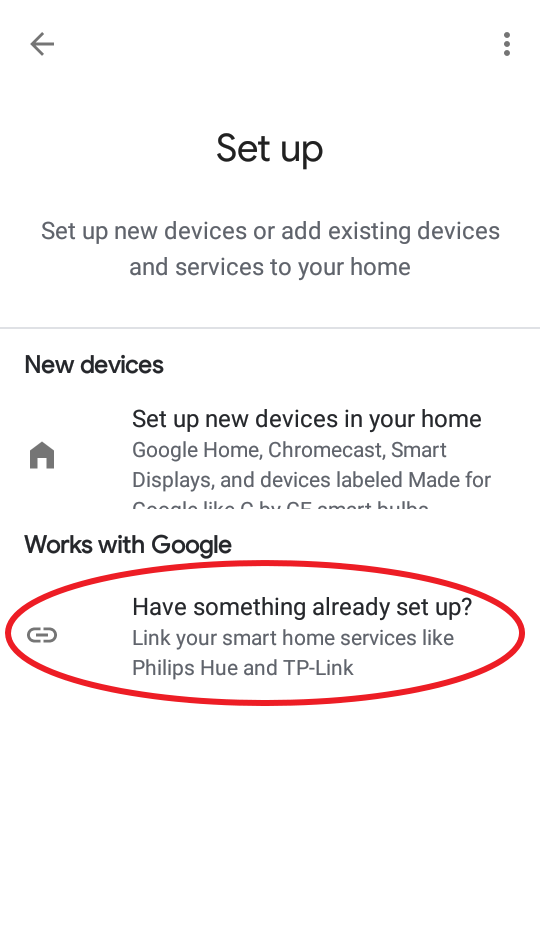
Tap "Have something already set up?".
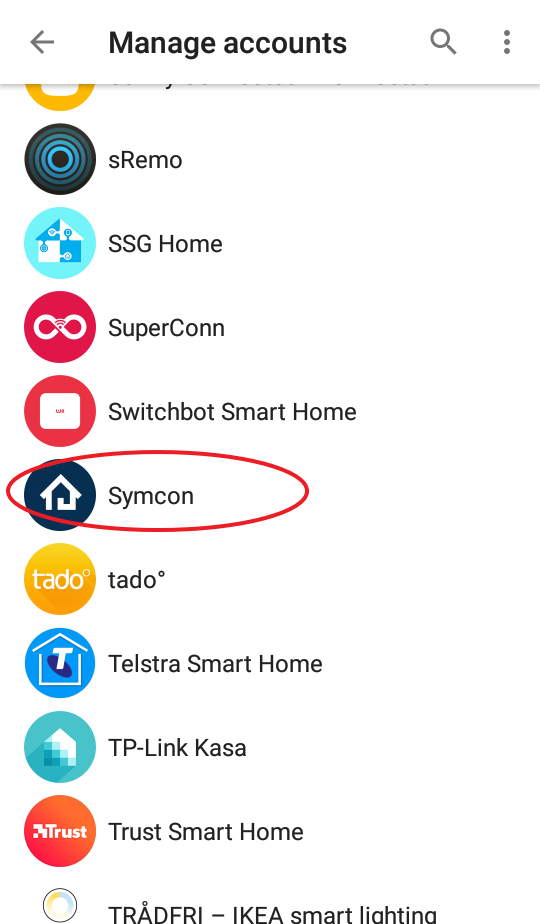
Tap "Symcon" in the displayed list.
Enter the e-mail address, that the IP-Symcon is registered to, in the popup and confirm with "Send verification code".
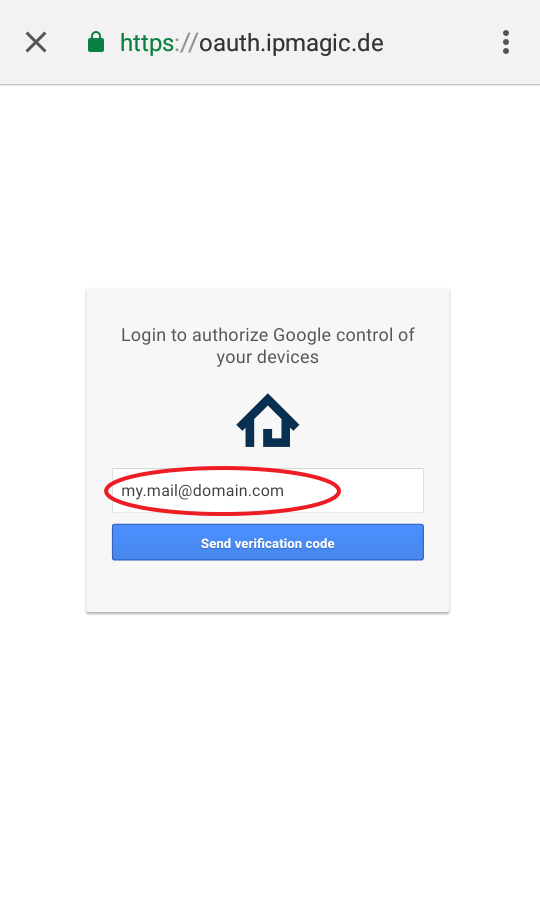
An e-mail with a code is sent to the provided e-mail address. Enter the code from the e-mail into the popup and confirm with "Verify code".
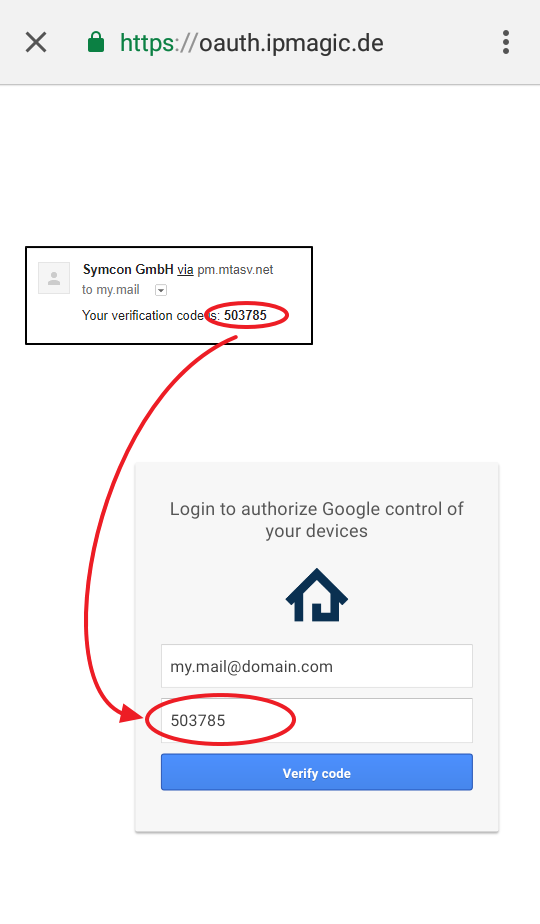
After successful confirmation, the prepared devices appear in the Google Home app and can be used.
